SevTech Tips and Tricks
Sevtech is currently 3.0.6 : Get it here !
Here is the web view https://borg286.github.io/sevtech/
Please use this if you don’t intend to propose tips.
Feel free to add comments, and propose changes here.
Performance tips:
-
Don’t allocate more memory than needed. The standard pack shouldn’t need more than 4GB of RAM allocated.
-
Custom java arguments for garbage collection: -XX:+UseG1GC -Dsun.rmi.dgc.server.gcInterval=2147483646 -XX:+UnlockExperimentalVMOptions -XX:G1NewSizePercent=20 -XX:G1ReservePercent=20 -XX:MaxGCPauseMillis=50 -XX:G1HeapRegionSize=32M
-
Disabling certain mods can improve performance:
-
Better foliage - This mod makes leaves and grass appear more complex.
-
Fancy block particles - Replaces breaking blocks into a 3D variant.
-
Smooth font - Replaces the standard font.
-
-
Install optifine to finetune the graphical experience you want to have: https://optifine.net/downloads
- Some people report invisible blocks when using optifine, in config/thebetweenlands/config.cfg change B:fullbright_blocks=true to false.
-
Twilight Forest tweaks (config/twilightforest.cfg) :
- Set B:leavesFullCube=true to false to decrease FPS stuttering.
Seeds
-3503285926045735642 (pre 3.0.5) village (east), bone blocks, river, animals, swamp with shoggoth lair, shadow biome all somewhat near spawn point.
-115227398 (pre 3.0.5) Start in AbyssalCraft biome, close village to NW (Another South of that one), nice open area to the east with river biome, large forest and lots of animals. Another village north on other side of tall hills across grassy plains with lots of streaming water..
-8872794606572219902 (3.0.4) Spawn next to Laketown (village in middle of lake). High flat mountain at your back for strong star light with a tin vein. On other side of lake is a large flat area with **large **bone structure VERY nearby, Eucalyptus and a Mulberry tree, 2 coal, 2 copper veins, 1 gold. Lapis on island next to village. Majority of lake is only 1 block deep, making easy access to gravel, salt, sand, and clay. Nearby big hole(y=51 @ base) with Copper cluster. Snow mountain nearby (Build up 20+ blocks on peak for easy access to ceiling of The Beneath).
Ore distributions (as of 3.0.6):
| Material | Min Y | Max Y | Notes |
| Aquamarine | 150 | 246 | The Beneath only |
| Autunite | 8 | 33 | Overworld & Twilight Forest |
| Azurite (copper) | 12 | 44 | Overworld & Twilight Forest |
| Bauxite (aluminium) | 45 | 79 | Overworld & Twilight Forest |
| Beryl | 4 | 32 | Overworld & Twilight Forest |
| Black Quartz | 2 | 100 | The Beneath only |
| Casserite (tin) | 44 | 68 | Overworld & Twilight Forest |
| Cinnabar (redstone) | 5 | 12 | Overworld & Twilight Forest |
| Coal | 48 | 78 | Overworld & Twilight Forest |
| Corrallium | 4 | 56 | Overworld (Ocean & Swamp) & Twilight Forest |
| Galena (silver & lead) | 16 | 50 | Overworld & Twilight Forest |
| Gold | 5 | 30 | Overworld & Twilight Forest |
| Hematite (iron) | 32 | 60 | Overworld & Twilight Forest |
| Kimberlite | 2 | 15 | Overworld & Twilight Forest |
| Lapis | 10 | 24 | Overworld & Twilight Forest |
| Limonite (iron & nickel) | 6 | 32 | Overworld & Twilight Forest |
| Malachite (copper) | 39 | 44 | Overworld & Twilight Forest |
| Platinum | 3 | 25 | Overworld & Twilight Forest |
| Quartz | 6 | 29 | Overworld & Twilight Forest |
| Sphalerite | 35 | 55 | Only blacklisted in the nether & end |
| Teallite (tin) | 8 | 43 | Overworld & Twilight Forest |
Age 0
Uncategorized Tips
-
You can access the main quest guide by pressing L. Purple quests lead you to the end of the age (If there is no color, this is talking about the ones with 2 round sides. The stars are the final quest in the age).
-
If a rock on the ground doesn’t break in one click or sounds like grass when hitting it, LEAVE IT THERE- it’s an ore sample in disguise.
-
Carry-On is in the pack, it can pick up most passive mobs (no villagers, buffaloes, horses, or larger mobs). Note your reach is less than right clicking.
-
Lighting fire on cobblestone for your first kiln to cook your charcoal will last a bit longer then on dirt/grass.
-
Quark’s inventory drop-off button allows you to bypass the Stage’s restriction by letting you put unfamiliar items into nearby chests/hoppers
-
The world generates in a logical heat map. Need snow or a desert? Travel North or South until you find it!
-
The carrot in your inventory is where you can view your nutrition levels. If you raise the nutrition levels high enough you will get buffs. Let them drop too low and you’ll have debuffs. See nutrition below for healthy meals below
-
You can move faster on certain blocks like Grass Paths made by right clicking with a shovel
-
Use F7 to see the light levels on the ground and F9 to see the chunk borders.
-
Some blocks are disguised as other blocks. They are revealed in the correct stage. Always go back and check out areas you’ve already explored to see what’s new.
-
Rafts are an earlier form of water transportation. They are just a bit weaker and slower.
- Sometimes they sink. Use ‘Carry on’ (shift+right click) to fetch them.
-
Once you’ve picked a spot for your base and have some food(for regaining your nutrition), pillar up and die to get a skull compass leading you back to your base, I mean death point.
-
Shift/Sneak on your grave to retrieve your items.
-
Keep 4 wild dog pelts for creating awesome boots in the next age.
-
Once you get a saddle, go tame a horse (repeatedly trying to ride it) to speed up traversing the overworld. He can jump stone fence, but only with you riding. Be sure to bring a fence and lead with you for when you want to get off your high horse. Alternatively live near an ocean and use a raft to visit new places, taking care with the sharks and piranhas that attack when you get to shore. Piranhas jump out at you.
-
Instead of killing chicken, use Flint Shears to get lots of feathers. Each time they take damage but don’t run away.
-
If you find a village you can often trade hides for leather so you can skip the leather making process.
-
You can also trade fleece for string with better results than transforming it with work blade.
-
Be on the lookout for Sakura, Eucalyptus or Dark Oak trees. You’ll need the logs to upgrade your work stump into the mk2 version. It can hold full stacks of items for repeated crafting, and takes fewer whacks.
-
You can use punji sticks (crafted from sugar cane) to damage mobs. Can place on hoppers for collection, and on walls to deter spiders.
-
Lit fibre torches(right click unlit one on fire) are not as good as vanilla torches. They only provide a light level of 10, meaning mobs can still spawn 3 blocks away. Craft them into totem torches using 2 sticks for much better lighting. Note they occupy their square so may get in the way and be placed on the ceiling. Since the totem torch doesn’t require charcoal/coal to make you can get and will need a large supply. Use a Flint Workblade to instantly get sticks from leaves and fibre from weeds. Bring 3 workblades with you if you want to stock up.
-
The red cedar tree needed for the fire hopper requires a totemic ceremony to convert any sapling to red cedar sapling.
-
If you can’t find any sharks use a strainer together with a survivalist’s strainer to collect shark teeth (5% chance over 10 minutes is almost guaranteed).
-
If your grave gets removed (eg by the Hydra), you can recover it by using the /tmg_restore command from Tomb Many Graves mod.
Tools
-
Flint Hatchet: strictly a gateway into a crafting stump. Upgrade to stone axe ASAP.
-
Flint pickaxe: strictly a gateway into a cobble. Upgrade to stone pickaxe ASAP.
-
Flint spear: instantly break weeds(fiber) and leaves(sticks) without reducing durability like the workblade does. 4 damage as melee and ranged, but throwing it risks breaking it.
-
Whittling knife: only used to make totems. Scroll or right click in air to switch selected totem animals.
-
Flint workblade:
-
Can be used to instantly cut shrubs and leaves for twine and sticks respectively.
-
Right-click dirt/wood/stone to make a ladder. Great for animal pens.
-
Takes a random number of tries per block
-
Note you need to be on the side with the ladder else you fall through.
-
-
Shift-right click wood (logs – must be upright) to get some bark. Takes a few times of “scraping”
-
Shift-right click on grass path to make grass path stair.
-
Use it in a crafting grid to make many things (press “u” in inventory to see list).
-
Like other flint tools it is not repairable like stone tools are.
-
Makes a good early weapon.
-
-
Stone pickaxe/axe/sword/hoe/shovel: You can repair your stone tools on the go by crafting it with cobble
-
Early game AIOT: Try to collect as many as possible bear claws (obtainable from any type of bear, easiest are brown bears on swamps). That will allow you to create bear claw paxel which is the best weapon in Stages 0-1 (good amount of damage, very fast attack), it’s also a quicker pickaxe/axe/shovel than stone based tools. Can be repaired with bear claws (that’s why you should collect more of them). It’s extremely useful later as a mining tool.
-
Flint shears: cuts leaves (makes totem wind chimes more musical), vine(useful for biome detector in age 1). Prevents Creepers from exploding. Used on chickens drops a feather, damaging but not frightening the chicken. No need to chase to get chicken meat.
-
Block rotator: while we don’t have access to a tool to rotate blocks just yet, you can press K to toggle how to determine the direction blocks face when placed. Useful for building houses.
-
Bladder: entry into leather making. Doesn’t place water sources, nor hold lava. Can put water in stirring pot.
-
Trowel: like shovel, but digging grass blocks often drop worms, which help getting fish in strainer.
-
Stone club: while being a slow yet heavy hitting weapon, it can mine cobblestone (faster than a pickaxe?).
Totems
When you’ve decided on a base then make a whittling knife and make 6 high totems. They act like beacons within 13x13x13 (note: zone is a cube, not infinite column). You don’t need the totem music for these to function. See rituals below for that. With whittling knife in hand either scroll or right click the air to cycle through the options.
Start with the totem base on the bottom, and your choice for wood placed on top. All similar totems need to stack on top of each other, ie. 5 wolf totems 1 high only gives strength 1, whereas a 5 high wolf totem gives strength 3.
-
Bat - no falling damage (1 second)
-
Blaze - Fire Resist (3 second)
-
Buffalo - Haste
-
Cow - Slowness and Resistance II
-
Enderman - Night Vision (14 seconds)
-
Horse - Speed
-
Ocelot - Creepers don’t explode
-
Pig - Luck
-
Rabbit - Jump Boost
-
Spider - Spider (treats blocks as if they had ladders)
-
Squid - Water Breathing
-
Wolf - Strength
Totem tips
-
Put 6x horse and 1x enderman + 1x ocelot throughout your base. Put 6x high wolf and 6x cow on entrances of base to fend off foes.
-
When hunting for Shadow creatures during a night, carve a totem base and Enderman totem into the nearby trees, so that you have constant night vision. Add in Horse totems if the area is swampy for speed boost. Or Wolf totems if battling the Shadow Beasts.
-
When mining underwater for clay, salt, etc. take some wood logs, and make a totem with Squid, Enderman, and Buffalo totems. You’ll be able to breathe, see, and mine normally.
Farming
-
While you need to trade bonemeal with the farmer to get farmland for the quest, limit it to once. Craft dirt with bonemeal to get farmland easier.
-
Recall that Age 1 opens up the Hoe, so you can keep it small and use bone meal, and leave the large farm for later. Also, villages often have already hoed ground. Although some of it would already be gone when you get there, the ones with tall grass/other plants on it will still be hoed. Break the plant and immediately plant a seed and the plant won’t pop off. You can also attach a plow to the end of a horse and plow the ground before Age 1.
-
Use a Flint Workblade to instantly clear out shrubs
-
Even flowing water hydrates farmland
-
Water is only infinite in River and Ocean biomes.
-
Don’t bother with a shovel: make a garden trowel instead. When it comes time to bait your fisherman’s strainer, you’ll be glad you did.
-
Scout around for a Giant bone skeleton (simply a bunch of bone blocks lying in a formation) and grind them up to get loads of bonemeal.
-
Place a Drum near your farm and do the Zaphkiel Waltz for crazy fast plant growth out to a radius of 6.
-
Focus on wheat seeds and cotton, as growing your animals and string surplus is very important.
-
You can throw cotton seed on the ground and it will grow a new cotton plant where the seed drop after a little time. It’s a easy way to make big cotton farm without farmland.
Homesteading
-
With an empty hand, you can shift+right click animals to pick them up and carry them. (villagers, horses or adult buffalo cannot be picked up, shift-right click for ½ of a second)
-
Fencing animals in a pen
-
Wildberry bushes
-
2 Dirt makes Dirt slabs. Dig 1 block down and surround pen with slabs
-
Stone fence
-
-
You can get 100% hatching rate with the eggs you picked up by dropping them (not throwing them) and performing the Zaphkiel Waltz.
-
Collecting chicken drops can be automated by putting a wooden hopper+chest under a chicken.
-
Buffalo can be bred with wheat so you don’t have to keep finding cows and doing the ritual
-
After you’ve found a few cows and optionally pigs, explore for a Bone blocks in clusters to get loads of bonemeal to get a fast supply of wheat.
-
Before killing your buffalo make a full totem of pig to get fortune 3
-
Hide is useful for glue in Age 1. Note: buffalo doesn’t melt down into glue, but does make 6 hide.
Automation
-
Place a wood hopper on the opposite side of your chopping block and throw items in to automatically place wood. This works for the stone anvil too.
-
Wood hoppers are available early on and you’ll need about 10-20 of them for a full automated age 0 and 1 setup. Mark 2 hoppers don’t need a chest to pull from, as you can place up to 4 stacks in the top for queuing. Only mark 2 hoppers can be chained together.
-
The grill can take up to 16 items for queuing. For automated extraction wait for Age 1 when you get a Dung Pipe to pull items out the side rather than a fire hopper needing to take the job of heating and pulling.
-
Upgrade to the craft stump mk. 2, which takes fewer whacks, and can hold stacks in each slot for quick crafting.
-
You’ll need ~20 drying racks by the end of Age 1, so might as well make a drying wall.
-
When you want to get into beast of burden power be sure to have a 9x9 wall around the 7x7 area each horse/buffalo/llama needs. Use either stone fence, berry bushes or 2 block high wall. Otherwise after the beast is done working he wanders away and breaks the lead.
-
Make sure the horse grindstone is on the TOP layer of the 7x7x2 area (put another block under it so it’s at eye-level)
-
Wolves and buffalo are about the best for running your machine, bested only by fast horses.
-
To make beast’s work faster place dirt path by right clicking with a shovel on either dirt or grass.
-
The press and grindstone are needed much less often than a heavy supply of planks and sticks. Prioritize the chopper with hopper input and extraction.
Nutrition
The Nutrition mod encourages you to eat a balanced diet, giving you relevant buffs for eating food. See farming and homesteading for how to get a healthy supply of ingredients.
-
To boost nutrition quickly, use the Millstone[BetterWithMods] to become hungry and chow down your surplus of food. You can use multiple cranks to speed this up.
-
If you’re unsure which foods you can eat to maximize your bars, you can filter food types by typing the category in JEI. For instance, searching for fruit will give you all items you have access to that increases your fruit bar.
Good foods to make:
-
Melon Pie(2 watermelon+egg+sugar): 4% Fruit
-
Hearty Stew(Baked Potato+Cooked Meat+5 bowls+4 mushroom+Barley/Wheat flour) cooked in a cauldron: 3.5% Grain Protein and Vegetable
- Be careful to only put in the minimum carrots as the cauldron cooks any spare carrots.
-
Pork dinner: Cooked Pork+Baked Potato + raw Carrots gives 3% Vegetable, Protein
-
Tasty Sandwich: Cooked Meat of any kind + Bread gives 3% Grain, Protein
-
Rice (very spammable): 1% Grain, negligible hunger, 0 saturation
Combat
-
If playing non-peaceful is too stressful for you, you can switch to peaceful for all but 2 parts and still get into Age 1. You’ll need the shadow gem from Abyssal monsters spawning in an Abyssal biome, and also dealing with shoggoths in age 1.
-
If you use shears on a creeper, it stops them from exploding.
-
Mobs grow in toughness and availability as you progress through the pack
-
Attack with a lit torch to set enemies on fire
-
A flint workblade is as good as a sword
-
A Stone Club is spammable and great against packs of mobs. It is also faster at mining.
-
Mud makes for decent early game ranged spammable weapon
-
Making a stone-braced wooden shield will make handling darklands combat a lot easier.
-
The Stone Axe is the strongest Age 0 weapon.
-
Spare Tomahawks auto equips when you throw them, great for killing creepers
-
The Totemic whittling knife is available as soon as you open Age 0. Make yourself one, and put down a totem base and an ocelot totem. It has a 5 block in each direction creeper griefing protection. Creepers will not blow up within its range.
-
For on the run buffs focus on nutrition and farming. You can get Speed 3, Strength 1, and Resistance 1, and nourished for healing. Having all 4 nutrition bars up you can get 20 hearts.
-
Defeating the Baykok boss from Totemic is highly recommended to do as soon as possible. His behaviour is mostly like that of a standard skeleton so he is easily cheesed by attacking his legs from a 1 block gap. If you can’t find parrots that you need to get the eagle-bone whistle, wait until Age 1 and summon a parrot using an abyssalcraft ritual.
-
When questing for the shadow gem set up a full 6 tall (1 totem base + 5 totem) totem of pig (luck 3), another for horse(speed 3) and another for wolf (strength 3). Add in ocelot (creepers are harmless) and endermen (night vision) totem with only 1 needed of each.
Inventory tips
-
Make shelves instead of chests. They hold 16 items instead of 12, and are more friendly to an inventory wall. Note: They don’t currently work with Quark’s Drop-off button (see below).
-
Craft a backpack when you get access to leather to hold your items (recipe is on page 6 of the backpack recipes past all of the dye-ing recipes).
-
After getting a backpack, tech straight to the Stone Backpack for 36 slots. Craft the leather backpack with a wood upgrade, then craft with stone upgrade
-
The Cart functions as a double chest when you sneak-right click on it, making by far it the best Age 0 storage option (if bulky).
- Attach to a horse with astikoor hotkey, R by default
-
You can deposit items in your inventory that are already in chests nearby by holding shift and clicking the drop-off button in your inventory. See Dropoff Button here: https://quark.vazkii.us/ This is great after an expedition to clear out things in your inventory you’ve already found a place for in your chests.
- You can also store restricted items. Just don’t try to select them in your hot bar or inventory.
-
The strainer box acts as a normal chest with hopper attached, so you can throw whatever into the water and store it in there.
Totem Rituals
Totem rituals allow you to make instruments, play a tune before the timer runs out to get various effects.
Tutorial video: https://www.youtube.com/watch?v=NXXumiUuZlw
Start a ritual by shift clicking the instruments in certain orders. After the ritual is started just hit the instruments in the right order.
Each instrument when activating a ritual has a set amount of music it can produce, you need multiple instruments on hand to complete most rituals. Eagle Bone > Jingle Dress = Drum > Rattle = Wind Chime > Flute
The first ritual you should do is the Infused Flute, giving you an infused flute, which makes it randomly perform as well as a drum or rattle each time you play.
You can play the drum with the rattle to activate both instruments at once. In same time you can use flute in offhand.
Place the instrument set near your farm and do the Zaphkiel Waltz ceremony for crazy fast plant growth.
Get the Jingle Skirt for a significant boost. (costs 3 bones, 3 sugar cane per jingle item!)
Once you get enough bone and sugarcane, make wind chimes and place under leaves (flint/bone shears cuts leaves) to improve their performance. Enough of them can complete the ritual alone.
Hate the rain? Instead of waiting for the Draconic Evolution block or cheating with admin commands, just do the dry ritual. Wonderfully low tech way to shut up that gloomy and loud rain.
Age 1
This age is focused on Prospecting for Bronze(tin and copper), 2 magic mods: Blood magic and AbyssalCraft, and having a minimal Better With Mods setup.
What you can do now
-
In addition to a crafting table, make a crafting table on a stick.
-
Vanilla chests are open so it is time to reorganize your stuff. Recall the drop-off button above can help keep things organized and your personal inventory clean.
-
You’ve unlocked the Hunting Dimension. Use sneak to enter the Hunting Dimension. Creeping moss changes what mobs spawn. Use the above soundproofing block to stop getting scared from the background noise it makes
-
You can place water with chisels and bits. Likely to get fixed in the future.
-
Aqueducts tutorial: https://www.youtube.com/watch?v=S7lRbhtiluw
-
You can make an infinite water source with 3 aqueduct blocks in a line and placing water sources on the 2 ends. The middle will become a water source.
-
Several items like Gears have easier to craft recipes now, be sure to double-check recipes for items from previous ages that were difficult to craft.
-
Stone wand lets you build out platforms quickly.
-
Replace your horse with Wild Dog Pelt Boots (Speed boost, no fall damage, 2 3 armor)
-
A crucible can turn zombie flesh and hide into glue. Useful for making torches throwable, crafting Better with Mods Wooden gears and Slime boots
-
The AbyssalCraft Crate is silent.
-
Does not retain items when broken
-
Does not work with Quark item drop off
-
Wooden hoppers can’t insert nor pull from those
-
-
Use storage crates (not to be confused with wooden crate). It’s also silent and it can be gathered with all the items using shift right click. Can be used as a limited version of backpack. Ideal for resource processing or builds. Note that the drop-off button doesn’t work with them, so shouldn’t be used for primary storage.
- Another problem: Unable to place a sign onto them, as shift+right click picks them up instead
Hunting Dimension
Craft 8 wood with a stone sword to get the portal frame blocks. Make a portal and activate with your sword. This world only spawns selected types of mobs. Entering the portal then sneak to enter the Hunting dimension.
Note: Mobs have more health here.
Creeping Moss
Creeping moss is a craftable item that allows the player to change the type biome of a chunk in the hunting dimension. Creeping moss can be crafted by surrounding a block of mossy cobblestone (just cobble crafted with vine) with 8 vines, leaves(use flint shears) or saplings. Once you have crafted the creeping moss, you can sneak and right click to set the moss to the biome you are currently standing in. Once the desired biome has been set, you can go into the hunting dimension and right click with moss (without sneaking) to apply the biome changes. Keep in mind that creeping moss can only change the biome of a chunk in the hunting dimension. Also some of the biomes that are harder to find, like ice plains, can be obtained using some special crafting recipes.
-
Make a mob grinder by placing a spider + ocelot totem, 1 layer for you to walk, then a wall of fence, with punji sticks the next layer out. The spider totem lets you climb up the walls of your tower

-
Punji sticks (sugar cane) make effective mob killer. They can be placed on the sides of blocks to prevent spiders from climbing over, as well as hoppers to automate collection
- TODO: how to deal with damaged items.
-
If breeding a bunch of animals for pelts isn’t your thing you can AFK and Farm for quite a bit of zombie flesh, melt it down to blood (16 flesh per block) and get some slime boots.
Prospecting
-
Having trouble finding ore? If you have a desert nearby, every stone you find on surface is a ore cluster. Mine it with a pickaxe to get the underlying cluster. Find the center of the chunk and dig down.
-
Every ground stone in a desert is an ore sample. Remember that deserts are north/south.
-
The Ore is setup in large veins, think 16x16ish. Locate the chunk a vein is in by finding a Sample on the surface. F9 to see the chunk borders. Use the prospectors ore and right click on a block. If an interesting ore is within 32 blocks straight down, then the prospector’s tool tells you how many it encountered along that path. Mine in that direction and prospect around to hone in on where the ore is. As of 3.0.4 ores are positioned in any of the four corners of the chunk. To find the ore more easily, look up the max Y position it can spawn at, and mine out the chunk at that level. (Use the depth meter.) Then point the dowsing rod straight down in the four corners until you get hit on the ore.
-
Make a 6 high buffalo totem when you find the vein to get haste 3.
-
To make Tin, Copper, and Bronze you can either make a porcelain melter or a seared melter, the former is easier. You need to pour them into either type of casting basin, then use the stone anvil to get ingots. These melters don’t make alloys and can be automated with hoppers, to the point of only manual activation of the faucet.
-
Place a hopper above the stone anvil to automate placing ingots.
-
Bronze leggings give armor 5 over leather’s 2. But bronze chestplate has diminishing returns, only improving leather’s 3 to a mere 4.
-
You do not need to go ahead and mine every ore sample you find. If your inventory is full, or you have another plan in your head, then mark the sample using your Atlas for future collection.
Automation
-
A dung pipe can pull out items from the side and drops them as items. Use this on a grill instead of a Flame hopper. Just have the dung pipe drop items into a wooden hopper.
-
Make a hoe, plant a garden. Remember the worms you find from hoeing grass will die after some time, so the hydration they provide is temporary.
- Prioritize Cotton (string) and hemp (Hemp Fiber) and** carrots/wheat(your favorite protein)**
Blood magic
Blood magic mod is based on Life Points earned through sacrifice by blood. Initially you’ll use your own HP to power it, and if you continue further into Blood Magic you can set up animal grinders.
-
After crafting the Blood Altar make a sacrifice dagger and stab yourself to fill altar with blood.
-
You can put rotten flesh in the Melter to get liquid blood, 16 rotten flesh gives you a block which crafts into 4 blood balls. This is helpful bootstrapping in to Blood Magic as you don’t need to create a full smeltery to stand in.
-
When crafting the blank runes to upgrade the blood altar, the weak blood orbs don’t get consumed when crafting. So you only need one block of congealed blood.
-
Place the 8 blank runes 1 block lower than the altar and around it. This makes a tier 2 alter.
-
If you want to continue further in Blood Magic follow the steps in this lets player’s video
AbyssalCraft
AbyssalCraft is a large mod opening 4 dimensions, growing knowledge about the great old gods. As you progress through the mod item’s names will unlock. Its power source is received from statues that direct power into firstly your necronomicon, then later you can store it into containers.
-
First and easiest is finding an abyssal biome and killing shadow monsters for the gem shards.
-
To make farming these gem shards easier bring wood for 3-4 totems, each 6 tall.
-
You can also use your hunting dimension with some creeping moss to quickly access an Abyssal biome.
-
-
Next and hardest is finding and farming a Shoggoth lair. They seem more likely around river biomes.
-
They seem to climb similar to spiders. They don’t deposit their sludge on bottom half slabs or string. They require a 3x3 hallways to move. However a bunch of them can shove one into a 2x3 hallway. If you are quick you can build a wall right at the bottom of the stairs leading into their lair before they manage to escape. You will get hit at least once since they can hit through a 1 block thick wall but focus on establishing a wall first and pretty it up later. You can build a 3x3 killing chamber at the top of your wall. Use bottom half slabs for the floor and don’t bust the wall leading to the lair until your ready for them to come through. Opposite of the wall you can build a 2 block thick wall with a 1 block high slit to slash at them through it. To collect the drop swing underneath and bust out one slab, replace it and repeat until you have all the drops. Mk2 hoppers can suck the items through the slabs for a much safer alternative.
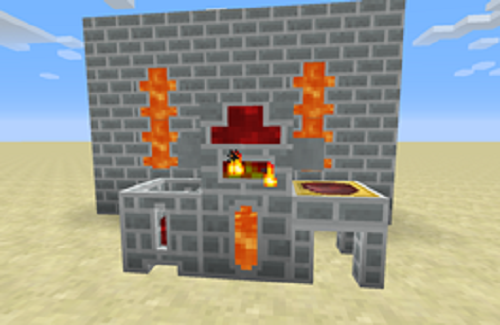
-
An image of the possible killing chamber (as described above): https://i.imgur.com/QmraP58.png
As long as you don’t go in far enough to attract the attention of the Shoggoth in the back, you should have a endless supply of them. My first attempt I went for a killing hole in the floor and it didn’t work out very well since that angered all of them which meant no new Shoggoth could spawn after they were all dealt with.
Punji sticks don’t work on them since they climb walls. Lighting them on fire with fiber torches is very slow. Slashing them is slow and consumes roughly 6 swords to get 1 stack of their drops.
-
Video tutorial on finding and dealing with Shoggoth: https://www.youtube.com/watch?v=mORTlnKoqHQ
-
Alternatively you can mine out a 1 block wide path into their spawn area and then make room behind you for 3 totems, 6 high pig for luck, 6 high wolf for strength, and 6 high cow for resistance, and 1 high endermen. Combine with bronze leggings and any available armor and you should be able to withstand their heavy blows.
-
Other method is to block exit of theirs room on stairs, leaving a space to smash them with spear, while having totems on top of blocking blocks.
-
Their hitbox is small and closer to the back of their skull. I guess this was to say the only way to deal with them is to out-smart them, namely by attacking their intelligence directly.
-
Spear has a bigger range than other weapons and it can be used to punch them without being touched even once. Combined with wolf totem it does a massive damage.
-
-
After crafting the statue place it away from your base and hold the necronomicon. The statue will send power into your necronomicon at 5 PE / 5 seconds taking about 15 minutes to get the 1000 needed. Randomly you may get struck by lightning and even explosive lightning, and sometimes wither effect. After getting 1000 points that area will have gotten tainted and will produce abyssal mobs. A shovel can quickly remove sludge produced by Shoggoths. They don’t poop ooze on half slabs.
-
The negative effects increase with how much charge is in the necronomicon.
-
To find Corallium look around for a biome looking like this or at least 40 ground level or below and then use a Weak Dowsing rod until it reports with finding Corralium.

-
Regarding Corallium, You do not *need *to find the Corallium biome, they spawn, albeit rarely in Swamp and Ocean biomes. Strip mining such is a slow but surefire way to get early Corallium.
-
When progressing in Abyssalcraft, betware the second dimension, the Dreadlands. Mobs there apply Dread Plague on hit, which while painful, will also convert the biome of the x/z point you are standing on to Dreadlands whenever it does damage to you. It also likes to refresh itself often. Try to avoid bringing the Dread Plague out of the Dreadlands, as if you bring it to the overworld and dreadlands enemies spawn in an un-torched spot, you might have a problem. For this reason, I would not recommend making Tinker’s weapons out of dreadium, as that’ll spread the plague to enemies on a critical hit.
The Beneath
Your goal is to get a handful of Black Quartz (for actually additions) and Aquamarine (for Astral Sorcery)
-
While the Melter can’t alloy tin and copper, you can use the kiln to get bronze, then melt it down, and pour into a block.
-
Darkness in the beneath hurts, so take a couple stacks of torches. Recall that coal doesn’t spawn everywhere, and for every charcoal you take bring equal twine. Alternatively take a flint workblade to shrubs and leaves to get loads of twine and sticks. Craft fibre torches, light them, then craft with 2 sticks to make Totem torches, ie. bypassing charcoal altogether.
-
Your “Beneath” teleporter can be moved. Either dig down or pillar up before placing and entering the Beneath. See next note to know when to stop.
-
It is better to pillar up in the Overworld rather than the beneath as spirits can push you off ladders and pillars.
-
Remember to use cobblestone for your pillar as you can use a Flint Workblade to carve out a ladder when you climb back up. Obviously you can drop into water for a quick decent.
-
You can pin torches to a side of ladder blocks making it safe from pushing you off by spirits. It’s better than pillaring up in the Overworld.
-
-
Black Quartz can be found from y = 2 to y = 20, Aquamarine can be found from y = 150 to y = 246
-
Before digging to a set Y area dig up till you see a cave. On the top of the caves you have a good chance of finding a few patches of ores. Aquamarine comes in veins of 12.
-
You can get throwable torches by crafting 8 regular torches with glue. This is great for handling dungeons and areas with spawners.
-
Place your beneath teleporter on top of the ground as you get teleported to the same y level and is on top of a platform in the other dimension
-
When you first get into the beneath, mark your spot, because it is a pain finding your way home
-
You can speed down a strip mine by running and jumping the whole way
-
11 Black quartz can be used to make black quartz AIOT
-
It is all the tools combined and the best age 1 weapon.
-
Has 1100 durability
-
Can be repaired with 3 Black quartz, a real bargain!
-
-
Upgrade your chestplate and helmet to black quartz, and if you didn’t get Bronze leggings, upgrade those too.
-
Don’t convert all of your Crushed Black Quartz into Black Quartz. You’ll need some of the dusts later to create Black Iron Ingots.
-
If you have a problem in finding caves on bottom of beneath while searching for black quartz just dig down below y=20 and do the normal branch mining.
Better With Mods
- Before we get into Astral Sorcery we need a Saw to get the bark off of Mulberry wood. Here is what a Mulberry tree looks like:

-
After making the Saw you’ll need to get started on the water wheel, as the hand crank doesn’t work on the saw. You’ll need ~36 hemp. Get the top of hemp plant but leave the base planted. Or just use a half stack of bonemeal. Know that breaking the hemp plant in the bone mealed state has 100% of dropping 1 seed and 0% chance of 2 seeds. (Or take advantage of Totemic “Zaphkiel Waltz” Ceremony)
-
Follow the main quest Guide to a waterwheel and gearbox and make 3 wooden axles (1 for the water wheel to be based on, 1 to connect to the gearbox, and one to deliver power to the saw.
-
You can tell the gearbox and axle are connected right by seeing the axle turn.
-
Making a 4th axle allows the mill stone (power must come from top/bottom of millstone) to be powered here instead of by hand.
-
You don’t need the axle between the gearbox and waterwheel, but is helpful later when needing the space to surround the mill stone with hoppers
-
Because Better With Mods drop all products on the ground so wooden hoppers are your friend, or put it over some water you’ve removed, thus creating a natural whirlpool into a (underwater net thingy) which stores items.
-
Completing the saw also makes Wooden gears much cheaper.
Astral Sorcery beginnings
Astral sorcery is based on star light feeding into bigger and bigger altars and actual star gazing. Getting the luminous crafting table opens the next age. This mod is gated on aquamarine whis is configured to come only from the top of the Beneath world, and Mulberry bark which can only be scraped off with a Better with Mods Saw, and a Necronomicon Ritual taking 1000 PE (waiting in front of statue with book in hand for 15 minutes, or with a Energy Pedestal).
-
Need bronze tier pickaxe or claw paxel to pick up the luminous crafting table.
-
The meat of astral sorcery is covered in Age 2: Astral Sorcery
Age 2
Uncategorized Tips
-
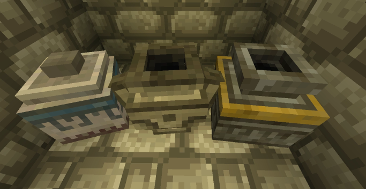
You can store Improved Backpacks’ backpacks inside Iron Backpacks’ backpacks.
-
There are a few useful baubles that we can now craft:
-
Climbing Gloves : Let’s you climb vertical walls.
-
Gluttony Charm : Consume food instantly
-
Sleep Charm : Sleeping is instantaneous
-
Portal Charm Allows for instantaneous travel through dimensional portals
-
Compass : The X and Z of the player
-
Stopwatch : The movement speed of the player
-
Depth Meter : The Y of the player
-
Slimey Compass : Whether or not the player is in a slime chunk
-
Chunker : The Chunk’s X and Y coordinate
-
Calendar :
-
Biomealyzer : Displays the name of the biome you’re in.
-
Super Sound Muffler : Allows for the muffling of certain categories of sounds
-
-
Not all of these baubles need to be equipped to work. Most will work as long as they’re in the inventory.
-
If you want to harvest any of the Low Grade Charcoal blocks, do so before entering the next age as this will cause them to turn into netherrack.
-
Monster spawners generate mossy cobblestone from regular cobble, making the mossy variant renewable. (possibly age 2 needed, can’t confirm)
-
SevTech contains the mod “Despawnable Spawners”. This mod is set up to destroy spawners (the cage block) after it has spawned 400 mobs.
What you can do now
-
Tinker’s Crafting Station
-
Boat
-
Books
-
Slime Sling, and obviously the Slime boots you had available in age 1, so you don’t die from flinging yourself
-
Quartz Grindstone[Applied Energistics 2]
-
Framed Storage Drawer
-
Mine Iron, Gold, Lapis
-
Ranged weapon, See Tinkers construct right below
Now that we have access to a lever, a dependable clock can be created using the turntable. Put a block on the (working) turntable, attach a lever to it. Activate the lever. Then make sure the faucet is on the other side of the lever. The rotation of the turntable will send a pulse to the faucet. Select the wanted speed by right clicking the turntable with an empty hand. There are four sides, so a single turntable can cycle four smelters/spigots.
In the picture below, the turntable rotates the switch so all four melters are emptied automatically. On top of the windmill’s gearbox is a bamboo chime. This block will emit a redstone signal when it rains, making sure the gearbox doesn’t get damaged.
Things to look out for
- If you see an Enderman you should absolutely try to kill him. If you can you should make a Luck 3 totem pole as well. Ender pearls are important. Endermen will only drop ender dusts. You can smelt these in the melter and cast them to ender pearls using the pan cast.
Which pickaxe to pick
Tinker’s Construct
These tools allow you to swap out parts, gain modifier slots the more you use them, and have a very large selection of materials to use. There are lots of abilities tied to each modifier, allowing a great deal of customization to fit your needs.
A bronze pickaxe (Bronze head, bone handle, iron binding) has diamond mining level, 578 durability, and Dense, and Magnetic. 2 bronze ingots makes a repair kit, repairing X durability.
Dense uses less durability the more damaged it is. Later can be combined with reinforced modifier and it will reach a point that it is infinite. In age 3 you can get the Excavation modifier to quickly level it up.
Black Quartz
While a black quartz pickaxe isn’t much to write home about, combining with the hoe, sword, axe, and shovel gives an AIOT tool (All In One Tool) with X durability, and great damage. 1 black quartz repairs 370 durability.
Betweenlands
Octine tools are better than iron: Mining Speed 6, 900 durability, can be enchanted
Valonite are as good as steel: Diamond mining, Mining speed 8, 2500 durability, can be enchanted
Twilight Fortress
Ironwood Pick: Diamond level, Mining speed 6.5, 512 durability
Mazebreaker: Diamond level, Mining Speed 8, 1561 durability, Efficiency 4, Unbreaking 3, Fortune 2
Tinkers Construct
Note: Blank patterns require Sidings from the Saw instead of sticks.
-
Make sure the pattern chest is touching both the pattern table and the part builder, otherwise you have to access it by clicking on the pattern chest tab.
-
The crafting station is the block that allows the rest to be accessed as tabs in one UI.
-
You can make one-use-casts by Melting clay and pouring it over astone part. Melting metal, and pouring it onto a clay cast, consumes the cast in the process.
-
Lasting casts can be made by pouring gold over a stone part. These casts won’t be consumed by future use.
-
Make a stone nugget to create the nugget cast.
-
Use a (clay, mud, seared) brick to create the ingot cast. You could use an ingot as well, but that seems wasteful.
-
Best bow
-
Wood bows have nerfed durability, so green slime arms are the way to go.
- Get **green slime crystals **by taking either glue or blood balls and crafting a slime cube -> green slime balls + dirt, sand –furnace-> green slime crystal (no cast needed)
-
Damage arrows (3.67 hearts average observed, 50 arrows): **Bone **arrowhead, reed shaft, feather fletching
-
Endurance arrows (1.9 hearts average observed, 170 arrows): Green slime crystal arrowhead, reed shaft, feather fletching
-
-
Melee: A bone and flint mattock with bone handle does as much damage as a diamond sword
-
Bronze heads are the best material for pickaxes, hammers, and things that need both speed and durability.
-
Here are the modifiers and descriptions
[Optional] Tool Forge
You can make a Tool forge by burning grout into seared stone and 4 tin/copper blocks.
-
Bronze is the only liquid metal worth making casts for at the moment.
-
Stone on the other hand, doesn’t require casts, and can be repaired easily. Recall parts can be swapped out when you get a full smeltery for better parts.
-
Make a Stone Hammer and Stone Lumber Axe for quick mining and felling
-
The materials used in faceplates and heads can be used for repairing.
-
A wood faceplate gives ecological (self repairing) and is cheap to repair, at the cost of max durability
-
Stone is a bit faster and as common when mining
-
Iron gives magnetic (pull drops towards you)
-
Slime gives high durability, sporadically spawn slimes when mining, useful for the excavation modifier next age.
-
Stone makes it mine faster the lower the durability.
-
-
Shuriken: The upper left-hand corner determines what material repairs it.
- 3 hearts average observed, 107 ammo: 1 Bone in upper left, 3 slime. Repairs with bonemeal, marginally less damage than bone and cactus shuriken, but way more ammo
Getting Iron
Iron is now open, but your melter isn’t going to get hot enough. In addition to tracking it down and mining it, you’ll need lava in either a porcelain or seared tank (matching your melter)
Handling lava
Before venturing out to find Hematite, make a couple Seared Tanks or Seared Gauges.
Pick one of the following for holding lava:
-
As many clay buckets as lava you need
-
A Between lands Bucket
 made from Syrmorite holds lava
 -
Wood Barrels can hold up to 8000mb of Lava and can be shift-right clicked to store in your inventory. Lava will burn the barrel if left in the Overworld. It will also burn you if you stand next to the burning barrel (oops). Placing a lid on the wooden barrel lets you pick it up into inventory.
Hematite
-
A 6 high buffalo gives you haste 3.
-
If you got a Tinker’s stone hammer, you can speed up mining Hematite by placing cobble and mining that.
-
You can melt iron by reconfiguring your melter to be heated by a Seared Gauge. Note the automation section above to automate the faucet.

- Make a stone bucket and place in a table, then melt 2 clay and pour to make a bucket cast. Pouring 3 iron gives you a bucket. Use gold instead of clay if you think you’ll need more buckets.(the watering can consumes the bucket in its recipe)
The Between Lands
Before we can make a smeltery, we need to take the side quest of the Between Lands. Because it has its own wood and tool tech tree, you’ll need to start from roughly scratch.
Goal: Obtaining a Aqua Middle gem found in Sludge Plains lakes
-
The druids spawn when you enter the ritual area, giving you time to prep before the battle.
-
Take the time to get slime boots when fighting the Druids. It turns their offensive spell against them. Alternatively make a Bat totem pole (along with Pig for luck) near the circle where you are fighting them.
-
The Betweenlands is a very large mod, consult http://the-betweenlands.wikia.com/wiki/Basic_Guide_to_Survival for some starting tips.
-
Take neither food, Potions, bedding, Vanilla Torches nor weapons (overland diamond < between wood sword)
-
Totem torches work normally in the Between lands
-
Setting the spawn point with a sleeping bag apparently works.
-
Find Bushes to get Weedwood sticks. The SevTech recipe killed weedwood planks -> weedwood sticks
-
-
Hunt down a Weedwood tree and make base in it
-
Instead of making 2 Sulfur furnaces, craft a single one with 8 betweenstone for a double furnace.
-
Your spawnpoint in the Betweenlands is not set when you enter through a portal. So setting your spawn should be high priority. The first thing to make with your Syrmorite ingots is shears, to get moss, to get a moss bed and set your spawnpoint.
-
Food is hard. Cook Swamp Reed
 into donuts for 6 hunger bars.
 -
Be on the lookout for Syrmorite ingots
 in pot
 inside Fortresses to get early access to lava-capable Syrmorite Bucket
 .
. -
To make a full smeltery, you will need to go to the Betweenlands and find a Aqua Middle Gem. To find it easily craft a betweenlands boat and row around until you find one, they glow in the dark and the boat bugs the water texture to be see-through. Remember to take a bucket of swamp water with you. The purifier needs it and the normal fuel to run.
Tinkers Construct Smeltery
Prerequisite: Turntable[Better with mods], Aqua Middle gem[Betweenlands]
-
A bucket cast is made from a stone bucket, not a clay one. You still need a clay bucket to get lava for the melter.
-
You can make casts out of Gold, Brass, or Aluminum brass(1 copper+3 aluminium). Seems you only have access to gold right now.
-
A tinkers smeltery can be as small a base of 1 square.
-
Smelteries can share sides, but not the tank nor controller. This helps avoid unwanted alloys.
-
Note: Obsidian doesn’t form in the smeltery, so you won’t have quick and easy access to Obsidian yet.
Twilight Forest
-
The portal to the twilight forest is built in the same way as usual. Because you do not have access to diamonds it is opened with a Starmetal Ingot.
-
When teleporting between worlds with a magic map, it might stop updating in the Twilight Forest. Save, quit & reload while in TF solves this. Storing the maps in a chest inside the Twilight Forest doesn’t bypass this issue.
-
Vanilla ore veins spawn in the Twilight Forest, and due to the dimension’s lower surface height can be a lot easier to reach, or in some cases even be found right at the surface.
-
If you notice a lot of FPS lag while in Twilight Forest, try reducing your view distance. This kind of stuttering is usually related to minecraft trying to render too many textures.
-
Hedge Mazes may contain a hostile wolf spawner, which if left intact may provide you with an easy source of pelts to craft into leather or glue if you have not yet started breeding animals at this point.
-
Medium and large hollow hills, as well as hydra lairs contain Redstone Ore, as well as Coal, Iron, Gold, and Lapis.
-
Maze wafers are a decent source of grain nutrients and can be found in Labyrinths and other dungeons later in the progression.
-
A more invasive alternative to getting at the Labyrinth’s secret vault for the Mazebreaker for your coal engine is using the old fashioned method: explosives. Angry Pebbles from Betweenlands towers works/TNT/letting creepers blow up.
-
Dark Towers have plenty of useful items to loot, including Brewing Stands, Anvils, and Pistons, as well as the Carminite Reactor you will need at the end of this age, in addition to this there will be plenty of spawners that will spawn carminite ghasts which you can kill for ghast tears, and there are a lot of chests to loot for other goodies like Redstone Lamps, glowstone dust, and a lot of protein food (Experiment 115).
-
Dark Towers also can contain Blaze spawners, though Blazes don’t actually seem to spawn in age 2.
Astral sorcery
-
Star light increases with Y level, up to 120. Higher than that doesn’t matter. Once you get more advanced altars this benefit doesn’t matter.
-
Need bronze tier pickaxe or claw paxel to pick up the luminous crafting table
-
Mischief of Mice’s top tips and a playlist of astral sorcery - bit by bit
-
The Resonating Wand does not make the Crystal Rock Samples more visible, like it does in the standard mod with Starmetal Ore.
-
Crystal rock samples look like:

-
When making a crystal grow by soaking it in starlight, if you continue past the maximum size there is a 1/6th chance that a second crystal will form with higher purity (this is also the only way to increase purity). See here for example
-
You ALWAYS want to use perfect crystals for rituals and collector crystals, and preferably celestial crystals
-
For the most part ones with poor stats are garbage and only really useful in lightwells and things that don’t care about quality (which you can tell by checking if the output item has stats in the tooltip, eg. Mantle of Stars or Altars do not care about crystal stats as a part of their crafting component)
-
Rock Crystal ore is not mineable with a stone pickaxe, you need something with mining level diamond to harvest it (like an iron or bronze pickaxe from tinkers or claw paxel available starting from Age 0).
-
In regards to liquid starlight generation in a lightwell: Aquamarine < Resonant Aquamarine < Rock Crystal < Celestial Crystal < Attuned Rock Crystal < Attuned Celestial Crystal
-
Celestial Gateways allow for inter-dimensional transport, you can set up gateways to travel to the end, nether (ceiling), or even other GalaticCraft planets - the multiblocks can be built in stage 2
-
The Crystal pick doesn’t seem to take damage when mining normal stuff.
Age 3
Ores: Galena (Silver and Lead), Limonite (Iron and Nickel), Platinum, Cinnabar (Redstone), Bauxite (Aluminum), Nether Quartz, Nether Amethyst.
Tools:** **
Key Items:
Nether
-
You can cast yourself a nether portal out of lava - https://imgur.com/a/tBwOZ - (unless you are close to one of the world generated ones).
-
When turning into hellfire dust know that the 8th dust spawns a ghast if you don’t have a vase under the hopper. If the hopper is receiving mechanical power, it also wont spawn a ghast or break when trying to create large amounts of hellfire dust.
-
Nether Amethyst Ore only spawns in the vanilla Hell biome (get a Biomeanalyzer). It’s rare, so Fortune III is recommended
-
When farming a blaze spawner don’t forget to make yourself some totems (luck, fire protection).
Storage
-
Obsidian chests are the best one block storage options for its price
-
You gain access to tanks, specifically from Immersive Engineering. While this multiblock is non-portable, it is very useful for storing large amounts of fluids. This is good for creosote, lava (though this might be difficult to collect), and water. These liquids have been, and will continue to be very useful (well you just gained access to creosote but it applies to it as well) so it is recommended to store up on them.
Tinker’s Construct Tools:
-
You gain access to the Ore Excavation modifier in this age (alongside the ability to add modifiers in general). Check options for the keybindings available. Ctrl+OreEx keybind opens up a GUI that allows you to edit shapes if you want.
-
OreEx will continue mining blocks with your tool even if it breaks, it only stops until one of the following happens:
-
Your hunger hits zero
-
You let go of the excavation key
-
-
You can swap parts on your tinker tools without any penalty. This lets you do something like create a pickaxe with a stone head, add the ore excavation modifier to it, and then mine through huge amounts of stone, repairing the tool as you go (make sure to have a Tool Station on hand and a LOT of food) in order to level it up very quickly. My personal preference was to add, in order, the ore excavation modifier, 5 reinforcement modifiers (ASAP as soon as you get the levels, to make the tool’s durability last longer than your hunger) to make it unbreakable, and then Luck III. Due to Ore Excavation, redstone (Haste) isn’t as important, so it can wait. Also, since you can replace parts without penalty, you can keep this pickaxe/axe/shovel/whatever for the rest of the game, replacing any part on it whenever something better shows up without having to worry about ever repairing it.
-
Absolutely make yourself a Luck III pick (costs 360 lapis), either on your main pick or keep a spare just for the ores that are annoying to find (nether amethyst, aquamarine, …)
-
Most geolosys ores are not affected by Luck, the ones affected by Fortune/Luck will be noted above in the Ore Distribution chart
-
Mobs with modified drop tables such as Blazes and Endermen are not affected by Luck/Looting
-
-
Magma block/Netherrack over a Lightwell generates Lava for your furnace.
Stoked Fire
-
Make a Hibachi and Bellows, plug bellows onto an axle and create a redstone clock (or make a timer) that turns of/on the gearbox. Put a redstone torch next to the Hibachi and you should see a blue flame - stoked fire. This unlocks many new cool things.
-
When you put 4 bricks above the stoked fire you will get a Kiln. You can make nether bricks in it - this unlocks the blast furnace from Immersive Engineering, therefore Steel and this will unlock doing most of the IE things in this Age.
-
When you put a Better with mods Crucible above the stoked fire you can melt down armor (gold and iron) to ingots and nuggets. Combo this with the hunting dimension and a mob grinder there to get infinite gold and iron.
Immersive Engineering
-
Except power, first thing you should make is a Metal Press (more efficient rods and wires).
-
The main quest progresses through the Immersive Petroleum questline, you will need a lot of steel to complete it, but otherwise it is fairly straightforward.
Airship
- Even though the airship looks cool, it’s not on the main questline and it’s very expensive to make. It requires you to upgrade the extended crafting table, and then make the airship using a lot of resources. Prioritize other progression before making it.
Astral Sorcery
-
Don’t waste time on a Mineralis ritual yet, it’s been reported and the configs need to be altered so it doesn’t break pack progression, same goes with Aevitas perk. Mining with this method results in a break in progression, as it can provide ores from GalaticCraft planets / Asteroids, this nullifying most of intended GalaticCraft methods.
-
The Armara perks make you extremely hard to kill, and several of the perks work on damage that doesn’t seem to be affected by armor. For example, the Dread Plague from Abyssalcraft is reduced in damage significantly by the ‘No armor is more armor’ perk, making the Dreadlands much easier than otherwise. Armara also almost reduces fall damage to 0, allowing you to use the slimesling without the boots.
Age 4
Ores: Assorted Quartz (affected by Fortune)
Tools:
**Key Items: **
-
IF’s Rancher gets around BWA’s Fleece and harvests wool from sheep directly, this can also occasionally be a source of powdered dye production from further processing the coloring byproducts from crushing wool
-
IF’s Water Condenstrator produces about 100mb/t of water per water source block adjacent to it
-
Spawner Agitators get around the despawning spawners limit
Age 5
**Tools: **
**Key Items: **See individual GalacticCraft section
Stage 5 really opens to be a kitchen sink pack with a lot of default recipes and minimal tweaks in configs. The only real big recipe changes are the creative items.
Power
- RFTools Powercells transport power interdimensionally
Ore Processing
- Mekanism Metallurgic infusers have a 1:5 tin to copper ratio for making bronze
Storage
- Quantum Storage Disks (from Quantum Storage compat with Refined Storage) store 2.14B items of any types and are very cheap, it trivializes most other storage options in the pack
Space
-
Moon
-
Can trade for the Tier 2 Rocket schematics with villagers if you don’t feel dungeon crawling for one
-
GalaticCraft ores are not staged, and therefore fake players can quarry them
- For quarrying, the two best options are RFtools Builders with a storage filter module (for blacklisting) or a Mekanism Digital Miner
-
Use Meteoric Iron sparingly until you get to the Asteroid belt as it’s generation requires waiting in either the moon or mars
-
Dungeon generation is different than before, dungeons do not share the same coordinates going from one planet to another
-
-
Mars
- Has a higher meteor rate than the Moon
-
Mercury
- One of the few GalaticCraft planets where you actually need the pressure suit as Armara + natural food regen cannot out heal the damage from this planet’s environment
-
Jupiter
- The dungeon is a little bit harder to find due to the fog, lightning storm, and monotone color palette of Jupiter, this was a screenshot of the dungeon entrance that I almost missed
-
Saturn
-
Saturn Slime Ore has incorrect localization, in-world WAILA will recognize it as Saturn Surface Rock, and needs to be silk touched to get the ore itself (easily found in the Surface in large patches of Saturn Infected Rock
-
Creative tips
You can complete all the quests by using the following command
/advancement grant playerName everything
You can revert to the beginning with
/gamestage clear PlayerName
You can complete individual quests with the following command followed by one of the below quests (prerequisite in parenthesis). Note this is a dump (minecraft/config/triumph/script/…) from 3.0.4 so may be outdated.
/advancement grant playerName only (some triumph from below)
triumph:stage0/kiln (needs workstump)
triumph:stage0/saltflats (needs grill)
triumph:stage0/horsechopper (needs horsepower)
triumph:stage0/tipi (needs leather)
triumph:stage0/grill (needs firepit)
triumph:stage0/workblade (needs upgrade)
triumph:stage0/flintknapp (needs mesh)
triumph:stage0/chestupgrade (needs firstchest)
triumph:stage0/fish (needs spear)
triumph:stage0/melterbase (needs flamehopper)
triumph:stage0/atlas (needs workblade)
triumph:stage0/farmland (needs workblade)
triumph:stage0/woodhopper2 (needs woodhopper1)
triumph:stage0/lead (needs leather)
triumph:stage0/charcoal (needs horsechopper)
triumph:stage0/wheel (needs saddle)
triumph:stage0/flamehopper (needs woodhopper2)
triumph:stage0/workstump (needs collectplank)
triumph:stage0/abyssalgem (needs abyssalbiome)
triumph:stage0/weaponize (needs firsttool)
triumph:stage0/upgrade (needs firsttool)
triumph:stage0/fiber (needs root)
triumph:stage0/woodenbarrel (needs fluidbladder)
triumph:stage0/totemic (needs leather)
triumph:stage0/horsepower (needs lead)
triumph:stage0/lowgradecharcoal (needs kiln)
triumph:stage0/handgrind (needs workstump)
triumph:stage0/collectplank (needs firstbreak)
triumph:stage0/tomahawk (needs weaponize)
triumph:stage0/melter (needs melterbase)
triumph:stage0/abyssalbiome (needs workstump)
triumph:stage0/mill (needs gear)
triumph:stage0/buffalo (needs totemic)
triumph:stage0/firsttool (needs root)
triumph:stage0/saddle (needs lead)
triumph:stage0/firepit (needs fire)
triumph:stage0/spear (needs weaponize)
triumph:stage0/firstbreak (needs firsttool)
triumph:stage0/baykok (needs buffalo)
triumph:stage0/firstchest (needs workstump)
triumph:stage0/mesh (needs fiber)
triumph:stage0/fluidbladder (needs workstump)
triumph:stage0/mat (needs leather)
triumph:stage0/leather (needs fluidbladder)
triumph:stage0/woodhopper1 (needs firstchest)
triumph:stage0/fire (needs firsttool)
triumph:stage0/gear (needs wheel)
triumph:stage0/stonetools (needs upgrade)
triumph:stage1/claybarrel (needs root)
triumph:stage1/tin (needs prospector)
triumph:stage1/woodbasin (needs root)
triumph:stage1/gearbox (needs waterwheel)
triumph:stage1/prospector (needs crafting)
triumph:stage1/parchment (needs aquamarine)
triumph:stage1/cart (needs wheel)
triumph:stage1/stepup (needs bloodaltar)
triumph:stage1/bloodaltar (needs alloykiln)
triumph:stage1/parrot (needs statue)
triumph:stage1/beneath (needs statue)
triumph:stage1/astable (needs journal)
triumph:stage1/dung (needs claybarrel)
triumph:stage1/chest (needs crafting)
triumph:stage1/alloykiln (needs copper)
triumph:stage1/crafting (needs root)
triumph:stage1/hoe (needs root)
triumph:stage1/axle (needs blackquartz)
triumph:stage1/huntingdim (needs root)
triumph:stage1/furnace (needs crafting)
triumph:stage1/turntable (needs gearbox)
triumph:stage1/coal (needs prospector)
triumph:stage1/bucket (needs turntable)
triumph:stage1/blackquartz (needs beneath)
triumph:stage1/tchannel (needs root)
triumph:stage1/statue (needs necro)
triumph:stage1/pedestal (needs statue)
triumph:stage1/plumbline (needs crafting)
triumph:stage1/stoneanvil (needs root)
triumph:stage1/aqueduct (needs root)
triumph:stage1/necro (needs bronze)
triumph:stage1/leafbed (needs crafting)
triumph:stage1/extension (needs claybarrel)
triumph:stage1/aquamarine (needs beneath)
triumph:stage1/journal (needs parchment)
triumph:stage1/bronze (needs alloykiln)
triumph:stage1/waterwheel (needs axle)
triumph:stage1/copper (needs prospector)
triumph:stage2/stevescarts (needs piston)
triumph:stage2/market (needs gold)
triumph:stage2/depth (needs compass)
triumph:stage2/smeltertank (needs iron)
triumph:stage2/lapis (needs dowsingrod)
triumph:stage2/gold (needs dowsingrod)
triumph:stage2/stopwatch (needs compass)
triumph:stage2/resonatingwand (needs enderman)
triumph:stage2/mapping (needs extendedcraftingbasic)
triumph:stage2/paper (needs root)
triumph:stage2/piston (needs twilight)
triumph:stage2/wool (needs root)
triumph:stage2/starpowder (needs dowsingrod)
triumph:stage2/skywave (needs conpaper)
triumph:stage2/extendedcraftingbasic (needs starpowder)
triumph:stage2/betweenlands (needs root)
triumph:stage2/bucket (needs controller)
triumph:stage2/enderman (needs conpaper)
triumph:stage2/twilight (needs astable2)
triumph:stage2/tcontable2 (needs tcontable1)
triumph:stage2/weedwoodsticks (needs betweenlands)
triumph:stage2/weedwoodsword (needs betweenlands)
triumph:stage2/rockcrystal (needs starpowder)
triumph:stage2/compass (needs controller)
triumph:stage2/drawertable (needs root)
triumph:stage2/biomealyzer (needs compass)
triumph:stage2/wateringcan (needs smeltertank)
triumph:stage2/dowsingrod (needs glass)
triumph:stage2/iron (needs dowsingrod)
triumph:stage2/conpaper (needs root)
triumph:stage2/lightwell (needs conpaper)
triumph:stage2/glass (needs root)
triumph:stage2/tcontable1 (needs root)
triumph:stage2/controller (needs betweenlands)
triumph:stage2/tcontable3 (needs tcontable2)
triumph:stage2/astable2 (needs lightwell)
triumph:stage2/weird (needs enderman)
triumph:stage3/crudeoil (needs sampledrill)
triumph:stage3/iehammer (needs iebook)
triumph:stage3/drawercontroller (needs workbench)
triumph:stage3/blazerod (needs nether)
triumph:stage3/projector (needs iebook)
triumph:stage3/rails (needs root)
triumph:stage3/steel (needs creosote)
triumph:stage3/oreprospector (needs root)
triumph:stage3/circuitboard (needs vacuumtube)
triumph:stage3/bauxite (needs oreprospector)
triumph:stage3/liquidplastic (needs propene)
triumph:stage3/vacuumtube (needs workbench)
triumph:stage3/standardhull (needs woodhull)
triumph:stage3/netherbrick (needs potash)
triumph:stage3/creosote (needs iehammer)
triumph:stage3/filteredhopper (needs nether)
triumph:stage3/platinum (needs oreprospector)
triumph:stage3/iebook (needs root)
triumph:stage3/conveyorbelt (needs workbench)
triumph:stage3/woodhull (needs stevescartsassembler)
triumph:stage3/galgadorian (needs standardhull)
triumph:stage3/redstone (needs oreprospector)
triumph:stage3/naphtha (needs crudeoil)
triumph:stage3/workbench (needs iebook)
triumph:stage3/amethyst (needs nether)
triumph:stage3/oreexcavation (needs oreprospector)
triumph:stage3/steam (needs naphtha)
triumph:stage3/bellows (needs hibachi)
triumph:stage3/propene (needs steam)
triumph:stage3/sampledrill (needs circuitboard)
triumph:stage3/windmill (needs creosote)
triumph:stage3/modularmachinery (needs circuitboard)
triumph:stage3/hibachi (needs filteredhopper)
triumph:stage3/silverlead (needs oreprospector)
triumph:stage3/distillation2 (needs naphtha)
triumph:stage3/extendedcrafting1 (needs nether)
triumph:stage3/netherexbiome (needs nether)
triumph:stage3/viescraft (needs extendedcrafting1)
triumph:stage3/waterwheel (needs creosote)
triumph:stage3/stevescartsassembler (needs root)
triumph:stage3/potash (needs bellows)
triumph:stage3/plastic (needs liquidplastic)
triumph:stage3/bonehoe (needs netherwart)
triumph:stage3/compactmachines (needs diamond)
triumph:stage3/netherwart (needs netherexbiome)
triumph:stage3/nether (needs root)
triumph:stage3/buildcraft (needs circuitboard)
triumph:stage3/nickel (needs oreprospector)
triumph:stage3/soundmuffler (needs redstone)
triumph:stage4/silicon (needs prospector4)
triumph:stage4/ardite (needs prospector4)
triumph:stage4/rsgrid (needs inscriber)
triumph:stage4/cobalt (needs ardite)
triumph:stage4/launchpad (needs nasaworkbench)
triumph:stage4/blockheads1 (needs root)
triumph:stage4/amadrontablet (needs plasticmixer)
triumph:stage4/manyullyn (needs cobalt)
triumph:stage4/solidendereye (needs root)
triumph:stage4/printedcircuitboard (needs compressediron)
triumph:stage4/endercrafter (needs enderalloy2)
triumph:stage4/certusquartz (needs prospector4)
triumph:stage4/moon (needs t1rocket)
triumph:stage4/enderalloy3 (needs theend)
triumph:stage4/pressurechamberwall (needs compressediron)
triumph:stage4/inscriber (needs certusquartz)
triumph:stage4/extendedcraftingelite (needs manyullyn)
triumph:stage4/spacesuit (needs nasaworkbench)
triumph:stage4/machinecasing (needs printedcircuitboard)
triumph:stage4/compressor (needs enderalloy3)
triumph:stage4/laserassembly (needs amadrontablet)
triumph:stage4/plasticmixer (needs compressediron)
triumph:stage4/ae2panel (needs inscriber)
triumph:stage4/compressediron (needs root)
triumph:stage4/t1rocket (needs nasaworkbench)
triumph:stage4/prospector4 (needs root)
triumph:stage4/fuelloader (needs compressor)
triumph:stage4/enderalloy1 (needs theend)
triumph:stage4/blockheads3 (needs blockheads2)
triumph:stage4/enderalloy2 (needs theend)
triumph:stage4/blockheads2 (needs blockheads1)
triumph:stage4/theend (needs root)
triumph:stage4/nasaworkbench (needs endercrafter)
triumph:stage4/presses (needs theend)
triumph:stage5/wirelesscharger (needs charger3)
triumph:stage5/creativemodifer (needs ultimateingot)
triumph:stage5/creativeenergycube (needs ultimateingot)
triumph:stage5/emerald (needs prospectorstage5)
triumph:stage5/diamond (needs prospectorstage5)
triumph:stage5/inferiumessence (needs saturn)
triumph:stage5/prospectorstage5 (needs root)
triumph:stage5/diamondjetpack (needs electrumjetpack)
triumph:stage5/t2rocket (needs root)
triumph:stage5/charger3 (needs root)
triumph:stage5/osmium (needs prospectorstage5)
triumph:stage5/spacesuit4 (needs saturn)
triumph:stage5/neptune (needs saturn)
triumph:stage5/ultimateingot (needs ultimatecraftingtable)
triumph:stage5/creativefluidtank (needs ultimateingot)
triumph:stage5/electrumjetpack (needs root)
triumph:stage5/scanner (needs root)
triumph:stage5/cheese (needs prospectorstage5)
triumph:stage5/prosperityshard (needs inferiumessence)
triumph:stage5/desh (needs mars)
triumph:stage5/mars (needs t2rocket)
triumph:stage5/creativecompressor (needs ultimateingot)
triumph:stage5/skystone (needs cheese)
triumph:stage5/emeraldjetpack (needs diamondjetpack)
triumph:stage5/creativejetpack (needs ultimateingot)
triumph:stage5/ultimatecraftingtable (needs root)
triumph:stage5/marsrover (needs t2rocket)
triumph:stage5/saturn (needs mars)